How to Install Kali Linux on Usb Pen Drive
How to install Kali Linux on USB flash drive with the ability to update.

The article describes a way to quickly install Kali Linux on USB flash drive from under various operating systems. We will work from Windows and Linux.
The installation process is extremely simple and does not require special preparation. However, according to the results of the work, nuances exist. And to get started, start by disabling the BIOS UEFI secure mode.
Why is this needed?
- Now do not bother about the question of how and where to install the system. Whether to use a virtual machine or overwrite the Windows bootloader.
- Your Kali Linux will always be at hand, turning any computer at hand into the tool you need.
- Whatever goes wrong – nothing will suffer except a flash drive that is formatted in seconds.
- Immediately after working with Kali in this form, you will notice how much the system has accelerated.
- Significantly simplified work with built-in wireless adapters and much more …
Minuse
There are such. I will give you the most important one. Since by update and installation we primarily mean the exchange of data between devices, do not count on speed. This is not a bus for the HDD, but a simple, even the latest in its version, USB port. In general, installing updates of 1 GB on a flash drive with a capacity of 16 GB took me about 2 days and a complete simple computer. And immediately I advise you to prohibit the "live" Kali in the current session to go into sleep mode – otherwise you risk losing everything.
What we need to install kali linux on usb
During installation, the following will be used:
- A flash drive with a capacity of at least 16 GB (otherwise there may simply not be enough space after the update procedure)
- The image of Kali Linux 2016.X and a lot of free time, as well as a free car for a couple of days
- program Win32 Disk Imager to record from Windows
- Software Universal USB Installer
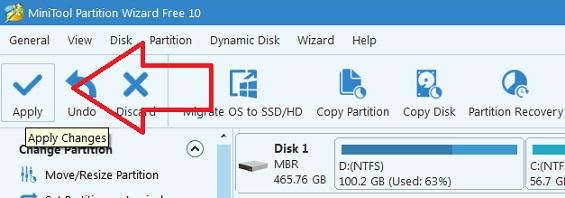
- MiniTool Partition Wizard Free program for creating partitions on a disk in order to save the results of actions taken
- Creating a Persistence partition with a newly created flash drive with Kali Linux
- how to verify that everything works
bootable Kali Linux USB
Install Kali Linux on a Windows flash drive: Win32 Disk Imager
To get started, install Win32 Disk Imager. Download and install it will not be difficult. Working with her is elementary. After installation, in the program window, specify the path to the downloaded image of Kali. You need to specify the USB flash drive by the button on the right. The writing will begin at the command of the Write button.
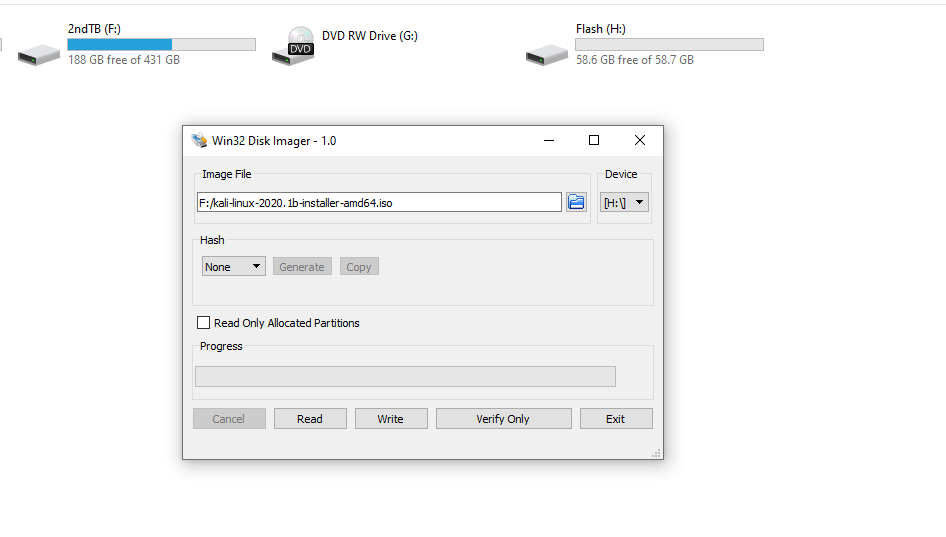
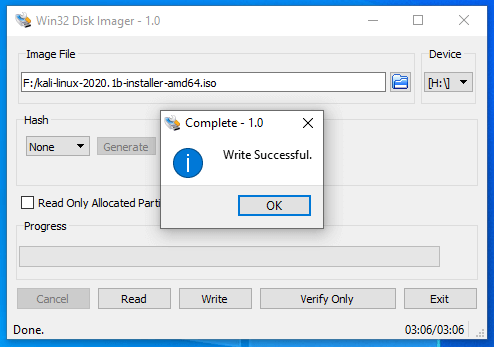
I advise you to use Fast USB ports, otherwise, the installation of Kali on USB flash drive will take tens of minutes. I used USB 3.1 and after 5 minutes it was done:
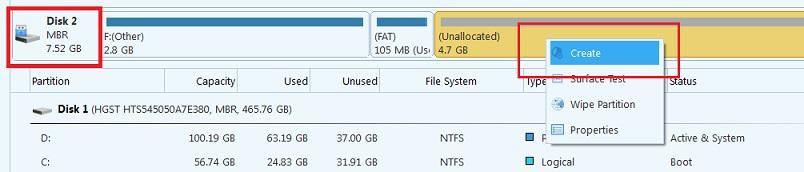
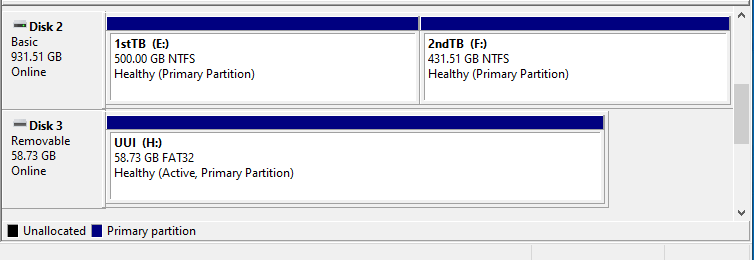
If you go to the system's Disk Management console, you can see how Win32 Disk Imager installed Kali Linux on a USB flash drive
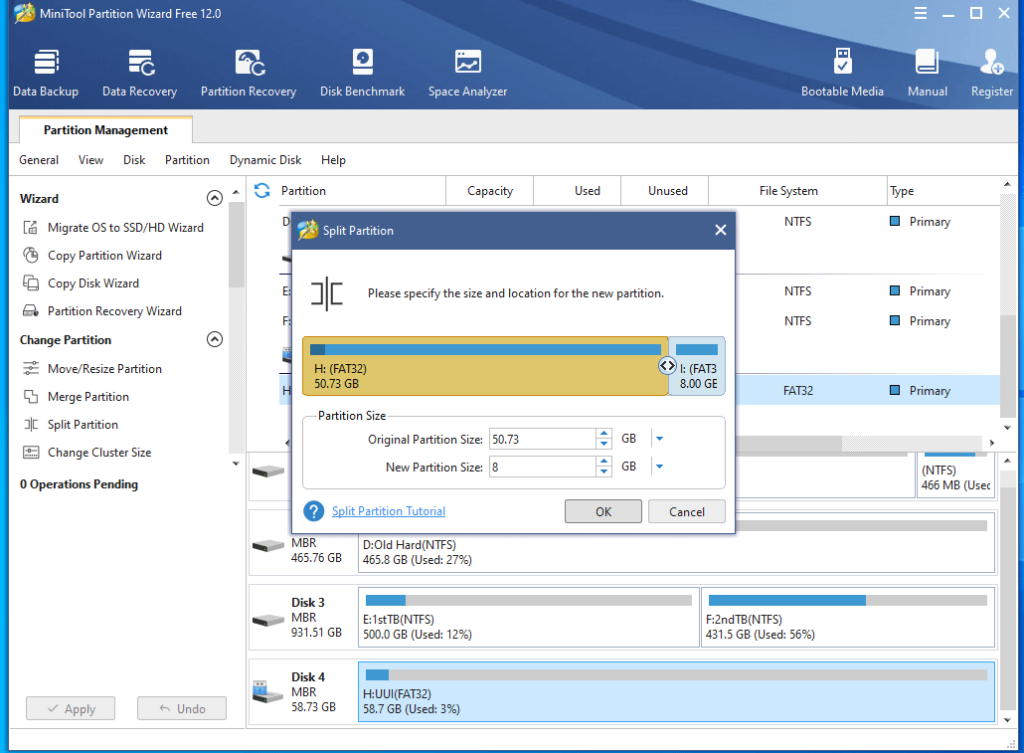
Please note how the utility helpfully split the flash drive into several partitions, leaving one (almost 5 GB) unallocated. We use it under the persistence section , which will store all changes while working with the Kali Linux flash drive. Launch MiniTool Partition and use it to create a section in the unallocated area of the flash drive:
We agree that Windows will not understand the contents of the section and in the settings window for the future section set them as shown in the figure:
- Title: Persistance
- Disc type: main (Primary)
- System Type: Ext3
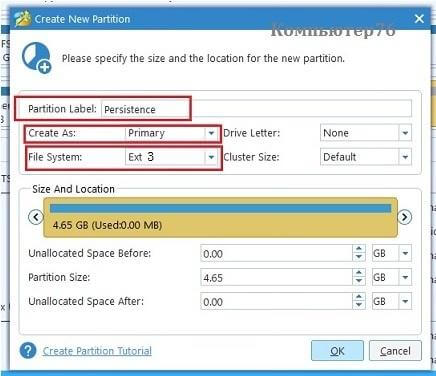
and save the changes:
Install Kali Linux on a USB flash drive: Universal USB Installer
The following program also copes with installing Kali on a USB flash drive. Moreover, manufacturers of the utility Universal USB Installer is positioned as a universal image installer and creator of live flash drives EXACTLY Linux-like systems. So after working with the program, at the output, you will receive a ready-made flash drive from Kali Linux, ready to be launched from any computer.
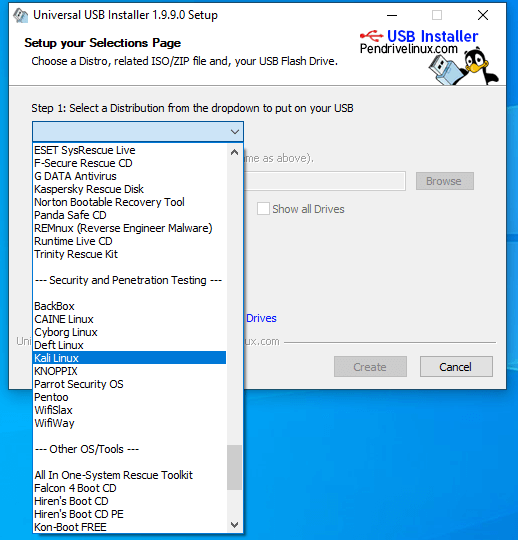
The utility does not require installation. And after starting the program window will ask you to specify what exactly you want to see on the bootable USB flash drive:
By the way, to the right of the distribution selection button, you will see the Download Link function , with which the utility will direct you to the Kali website in the browser, from where the image can be downloaded. But oh well. In the
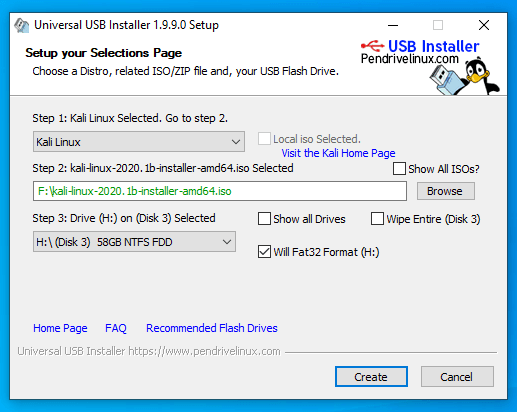
Step 2 field, point to the Kali Linux image, where it is located on your computer (the utility can isolate it among other disk images if there are several), and through
Step 3 points to the USB flash drive itself. Before recording, the installer window will look something like this (if the flash drive is not ready, the utility will format it right from here):
- Step 1: Choose Kali Linux to put on our USB
- Step 2: Locate the kali linux iso
- Step 3: Select the USB drive letter and check the format drive to make sure we clean up all the content of our USB
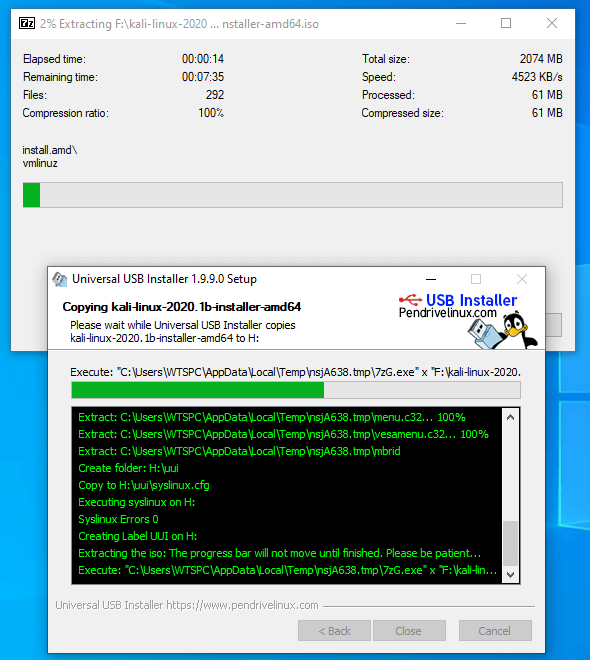
Two windows will go in the background: unpacking from the image and recording data.
We again go tothe WindowsDisk Management console . This time the flash drive will appear before us in this form:
The utility completely captured the entire space of the flash drive, leaving us no space for an additional Persistence section, which will allow us to save the changes made in Kali. So you have to repeat the operation to create the persistence section from the previous paragraph. But there is no section yet, so first split up the flash drive:
Creating a Persistence partition for Kali Linux on a USB
There is no sensible translation for the name assigned to the section, so let me call it in the original language ( persistence ). But it is precisely its presence that will allow you to save all the changes made in the process of working with a flash drive from Kali. So no one should have doubts about its creation.
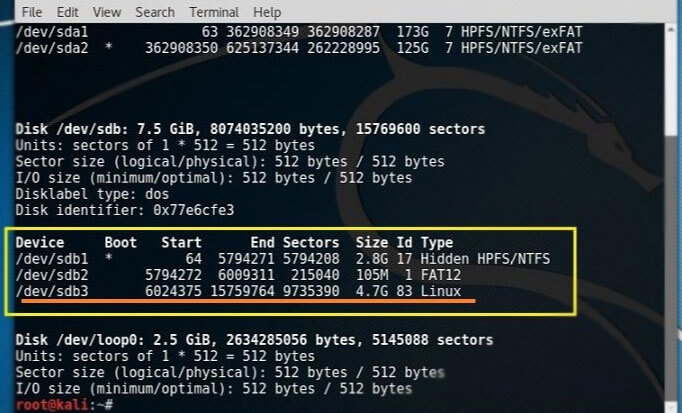
We reboot and we enter already from the just made flash drive. We define disks with the command in the terminal:
which section will you use? If you remember, there is only one section with the Ext3 file system in both options for compiling a "live" flash drive. Usually (in Kali Linux) it is given the name dev/sdb3. This also appears in my example in the photo, although I give the name dev/sdXY in the commands.
Immediately remember the following two commands (and in general – follow the spaces). It is worth starting with them at that moment, if after rebooting you find that updates and other changes are not saved:
mkfs.ext3 -L persistence /dev/sdXY
This will recreate the partition created in Windows on the Ext3 file system.
e2label /dev/sdXY persistence
And this one will give him the name persistence.
Getting to the creation. Create a directory in the flash drive file system:
Immediately create a section in it (it's better not to click on the Persistence icon on the Kali desktop):
mount /dev/sdXY/mnt/my_usb
where sdXY is the designation of the partition on your flash drive that you created before in Windows. As you can see in the photo, I got the usual name sdb3 :
If errors started, then they are most likely related to the wrong file system format. So pay attention to the first two teams that I cited at the beginning of this part. Remember the correct section name!
Now add a configuration file to make a temporary data warehouse:
echo "/union"> /mnt/my_usb/persistence.conf
The console should reply that the file has been created! Unmount the partition and reboot:
After rebooting, when the Kali boot menu appears, select the Live USB Persistence method – all changes made in the current configuration will remain with you. While it suffers the space allotted for the section. And you have to press this button whenever you are going to adjust the system itself.
Install Kali Linux on USB flash drive: check if saving changes works
- run from a flash drive
- open terminal
- create a file :testfile
- go to reboot
- boot from USB persistence again
- in the terminal we type: ls
If testfile is displayed in the list , everything works. Now you can install updates, in which, among other things, a choice of layout with Russian characters will appear. Do not miss and customize to your taste. The default usernames and passwords are the same: root and toor .
How to Install Kali Linux on Usb Pen Drive
Source: https://kalitut.com/create-bootable-usb-kali-linux-on/